Setup
Guide
Setup
1. Install WordPress
Before proceeding with the template configuration, make sure you have an active WordPress installation. If you don't know how to install WordPress, please follow this guide.
2. Export Webflow Template
Once your design is finished, you can finally export your template.
3. Convert with the Udesly Adapter App
Open the Udesly Adapter Web APP you can find on udesly.com and choose the WordPress section to upload your template. Upload the .zip file of the template you've exported from Webflow, insert template data (template name, author name, template description) and start the conversion.
If you accidentally delete some attributes or added the wrong ones, the conversion process will end with an error message like the one in the screenshot.
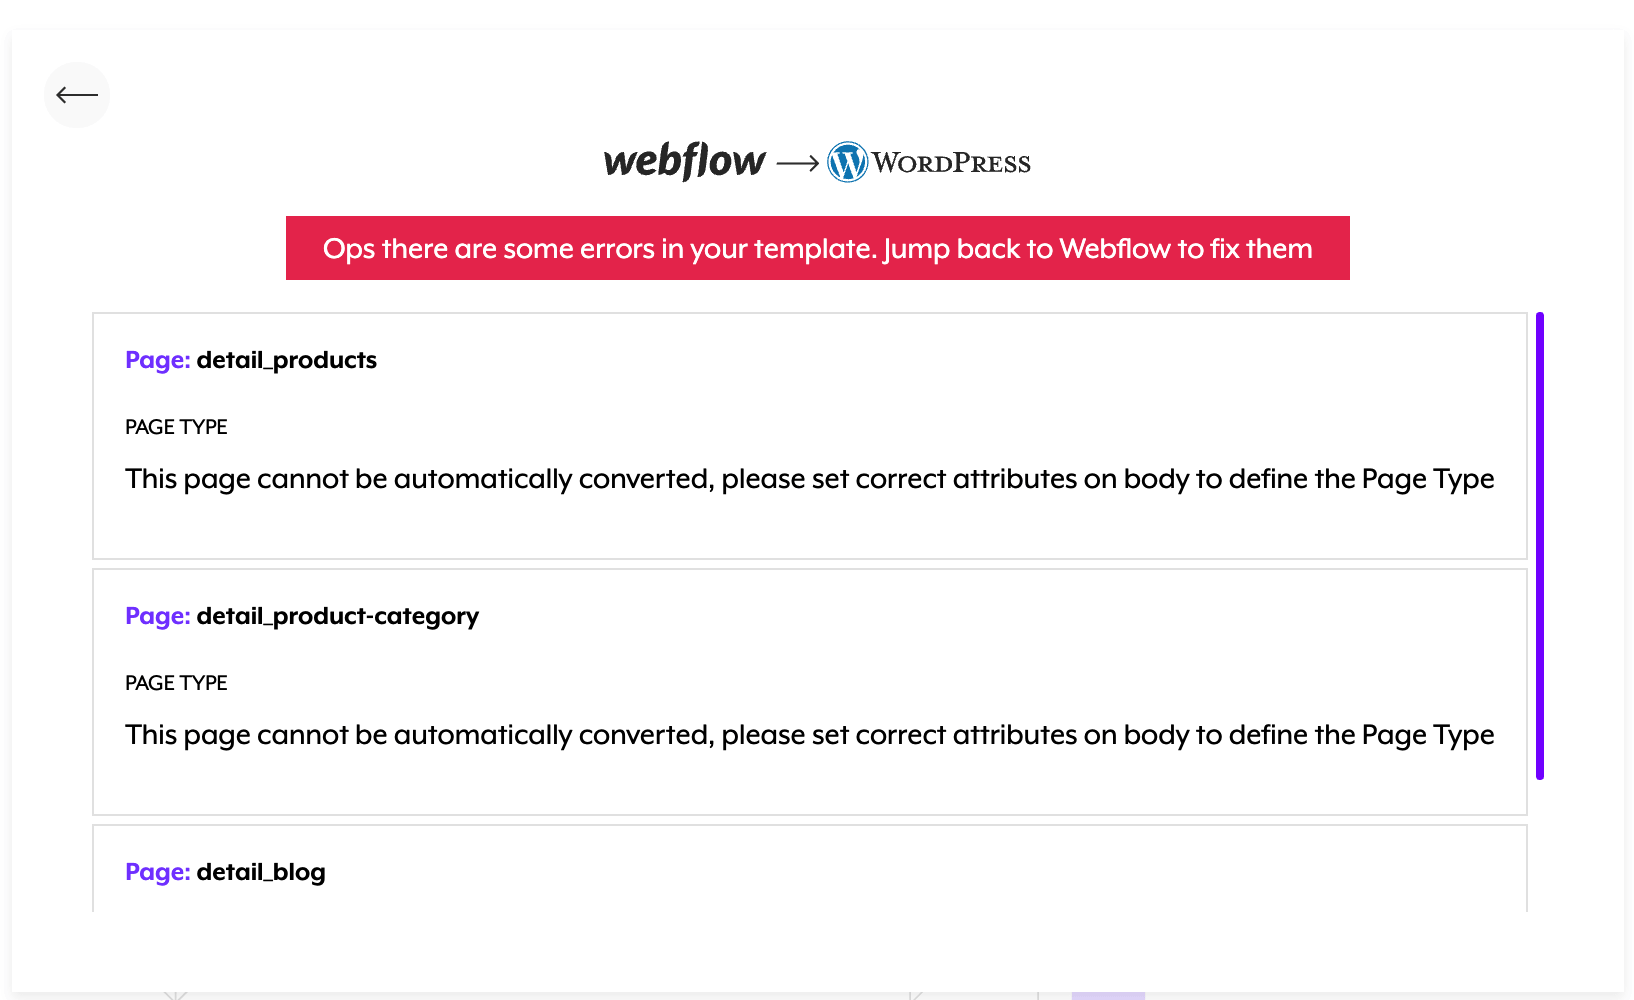
You’ll find all the missing attributes and the wrong ones that you’re required to fix. This will help you go back to your project and correct everything to launch a new, successful, conversion. If you need help with this, you can always contact us from our Help Center.
3. Upload and activate the converted Theme in WordPress
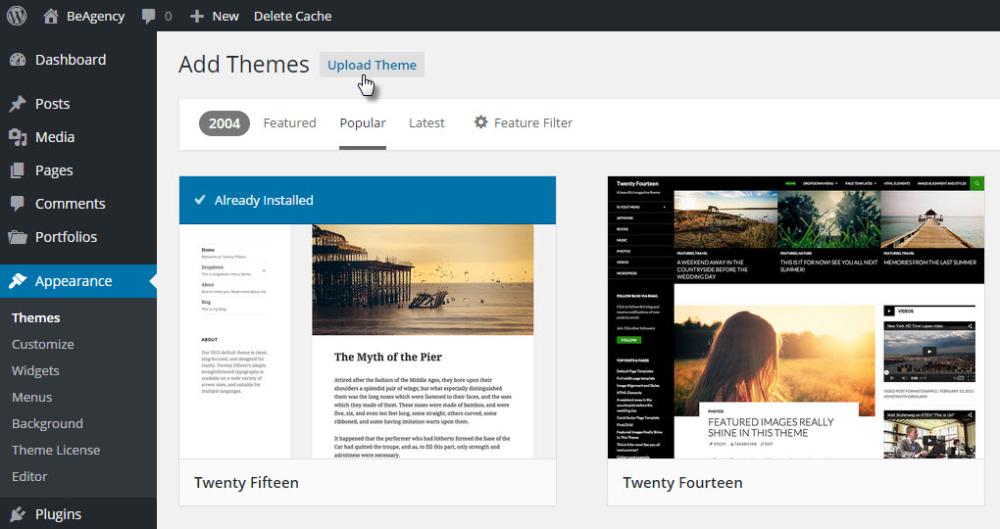
Once the conversion is ended you can download the converted template (zip file) on your pc. Now you can upload the converted theme (.zip file) from your WordPress admin panel.
Go to Appearance -> Themes and then click on the “Upload Theme” button.
Don't forget to Activate the Theme
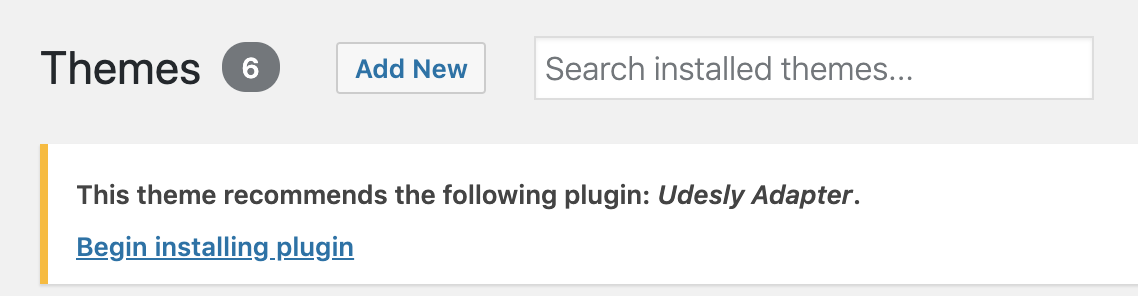
3. Install the Udesly Adapter WordPress Plugin
Once Activated the theme, you will find a notice in the top of your WordPress Dashboard:
Press on begin installing plugin and you will be redirect to this screen:
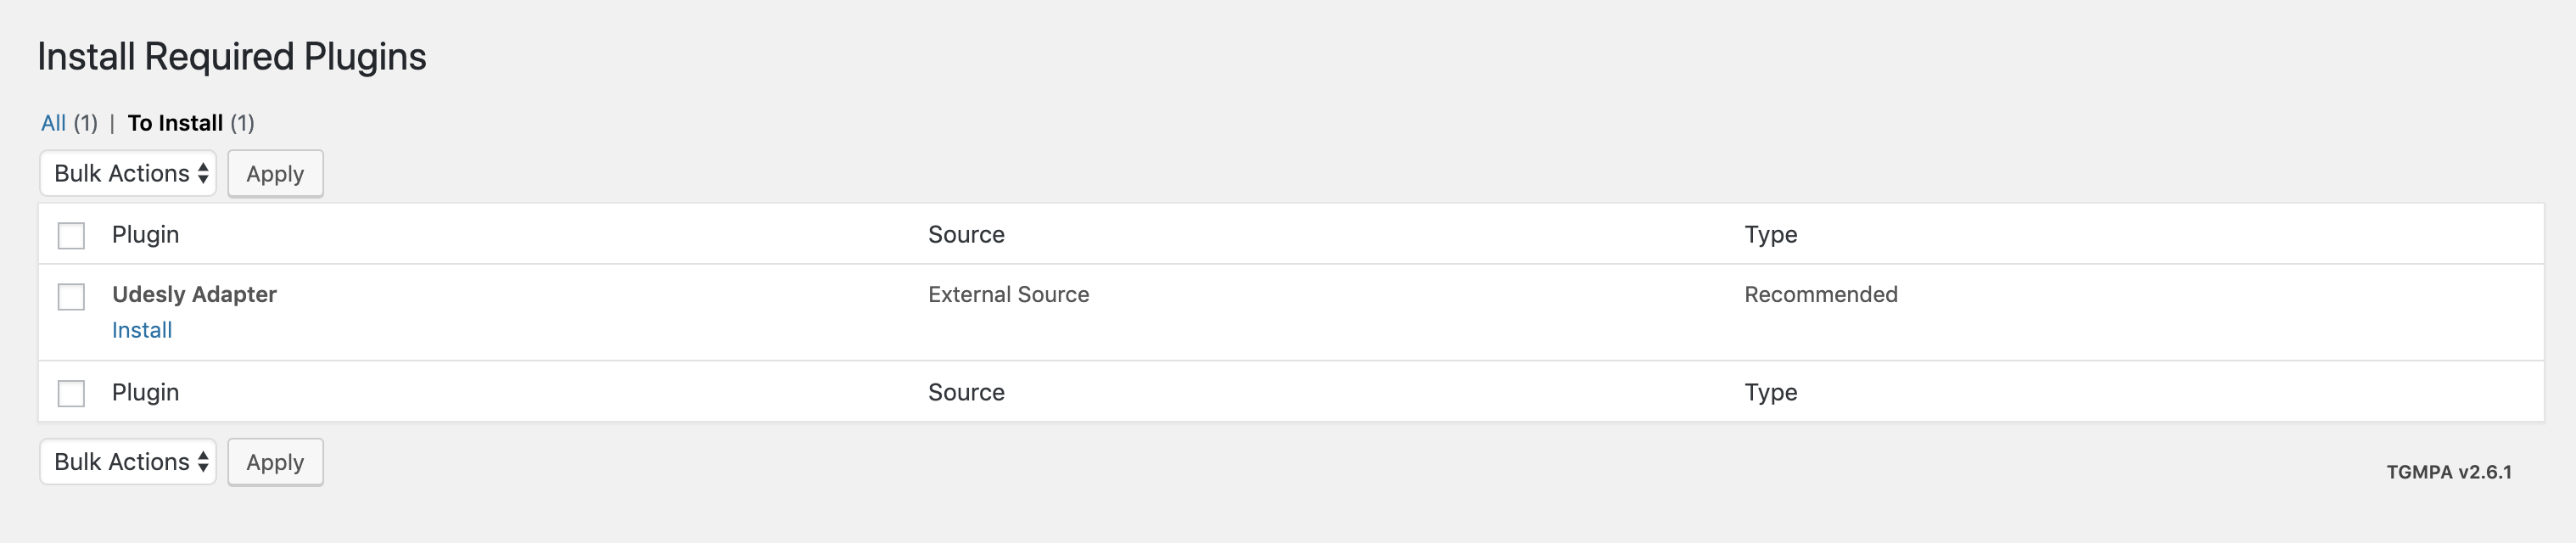
Check on Udesly Adapter, and press on Install to begin downloading, installing and activating the plugin.
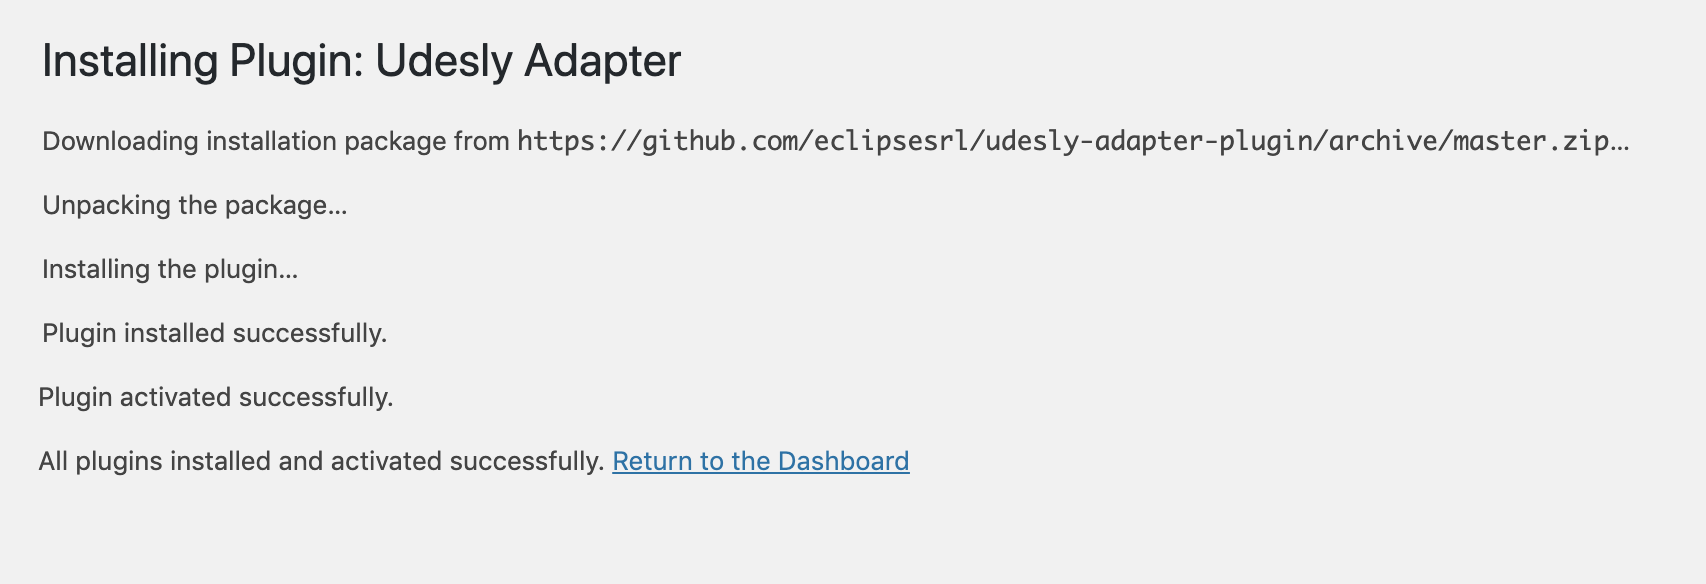
Once you will see this screen the plugin will be up and ready to run!
WordPress configuration
1. Import Webflow data
After the template upload and activation, you have to synchronize the template content. From the Udesly Plugin Menu in WordPress, select "Import from Webflow" section you can find the "Import data" button to synchronize the Webflow template content with WordPress. You can also delete all the imported pages or frontend editor elements. From the side menu you can check your missed elements and custom fields.

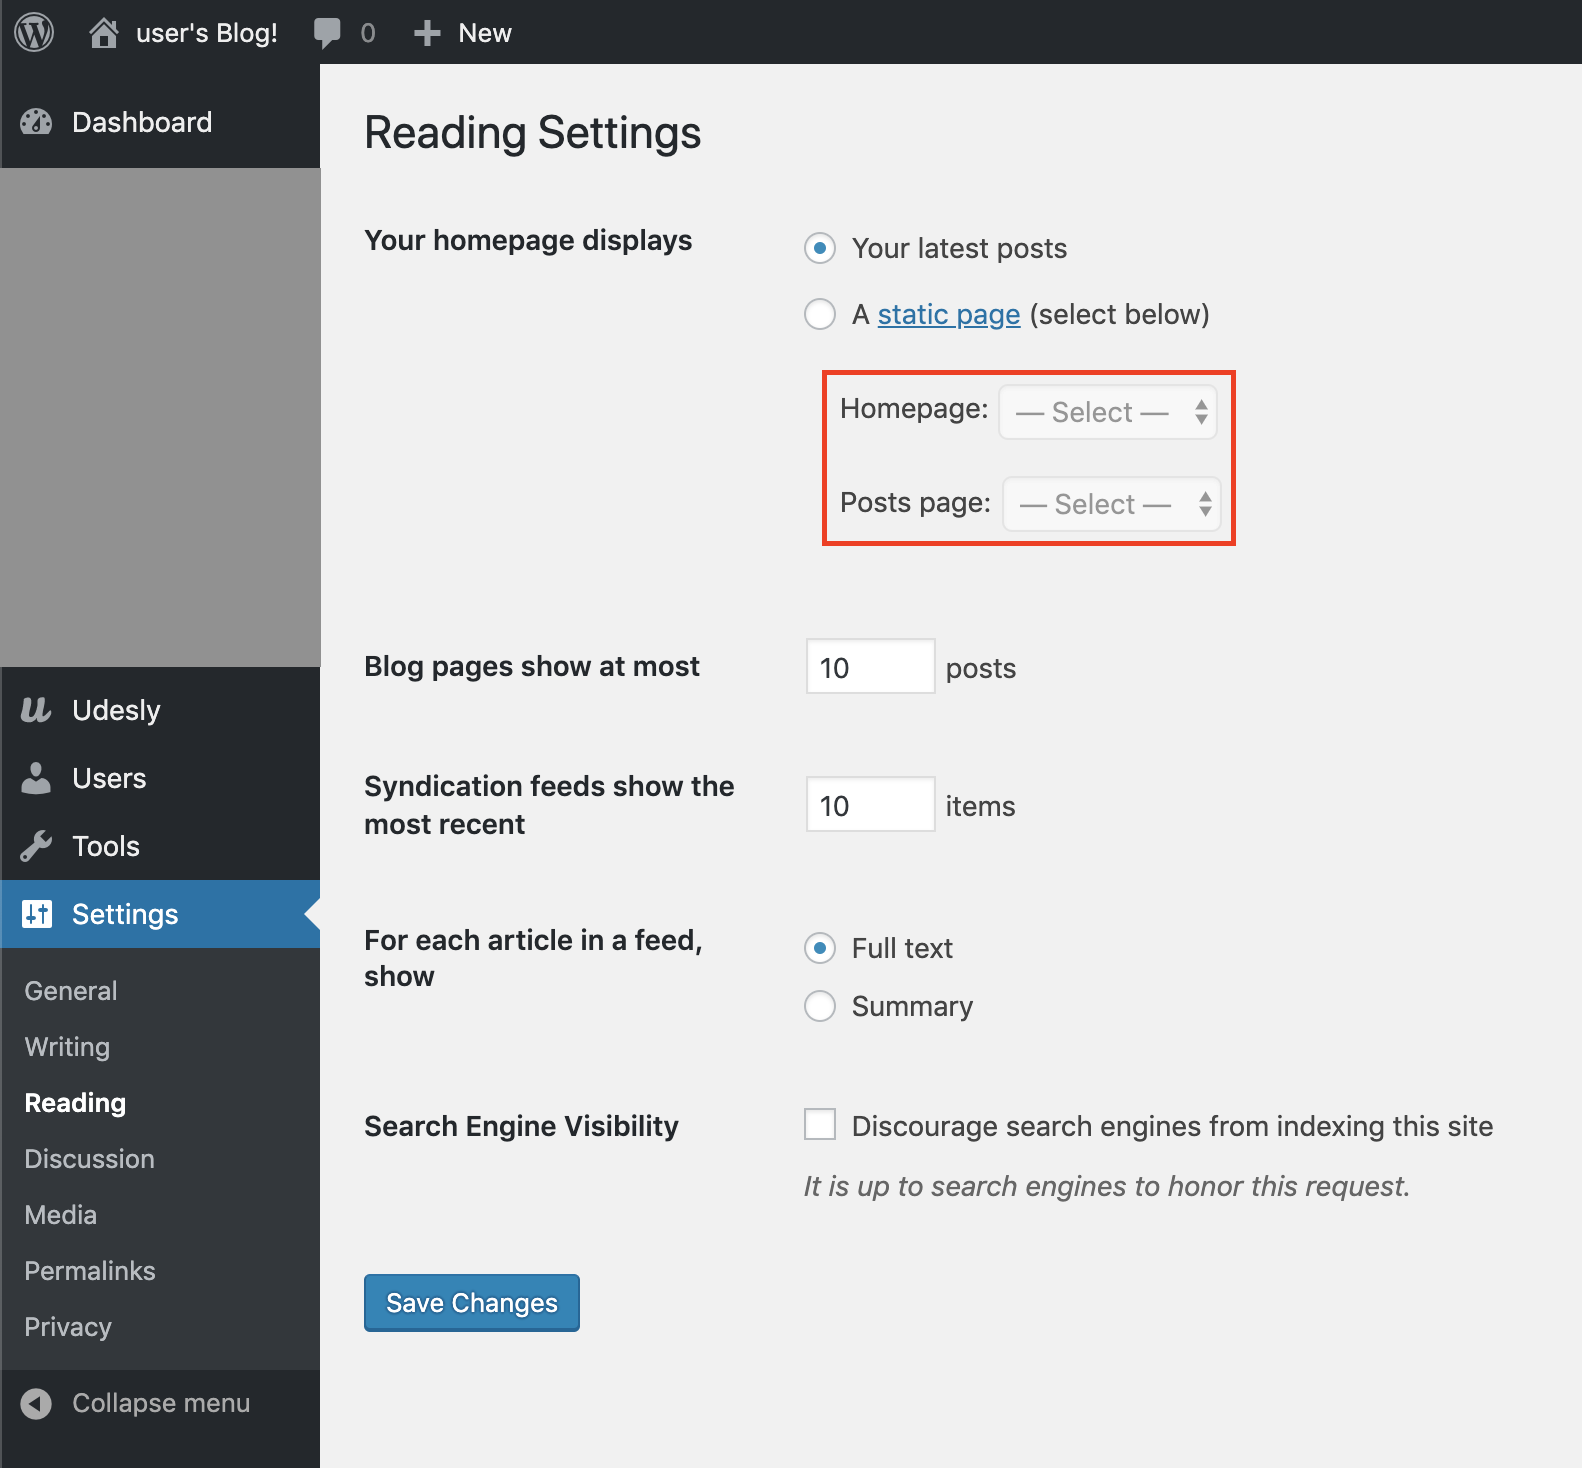
2. WordPress Pages Setup
Remember to set the homepage and the Posts page of your site following this path: Settings > Reading > Your homepage displays.
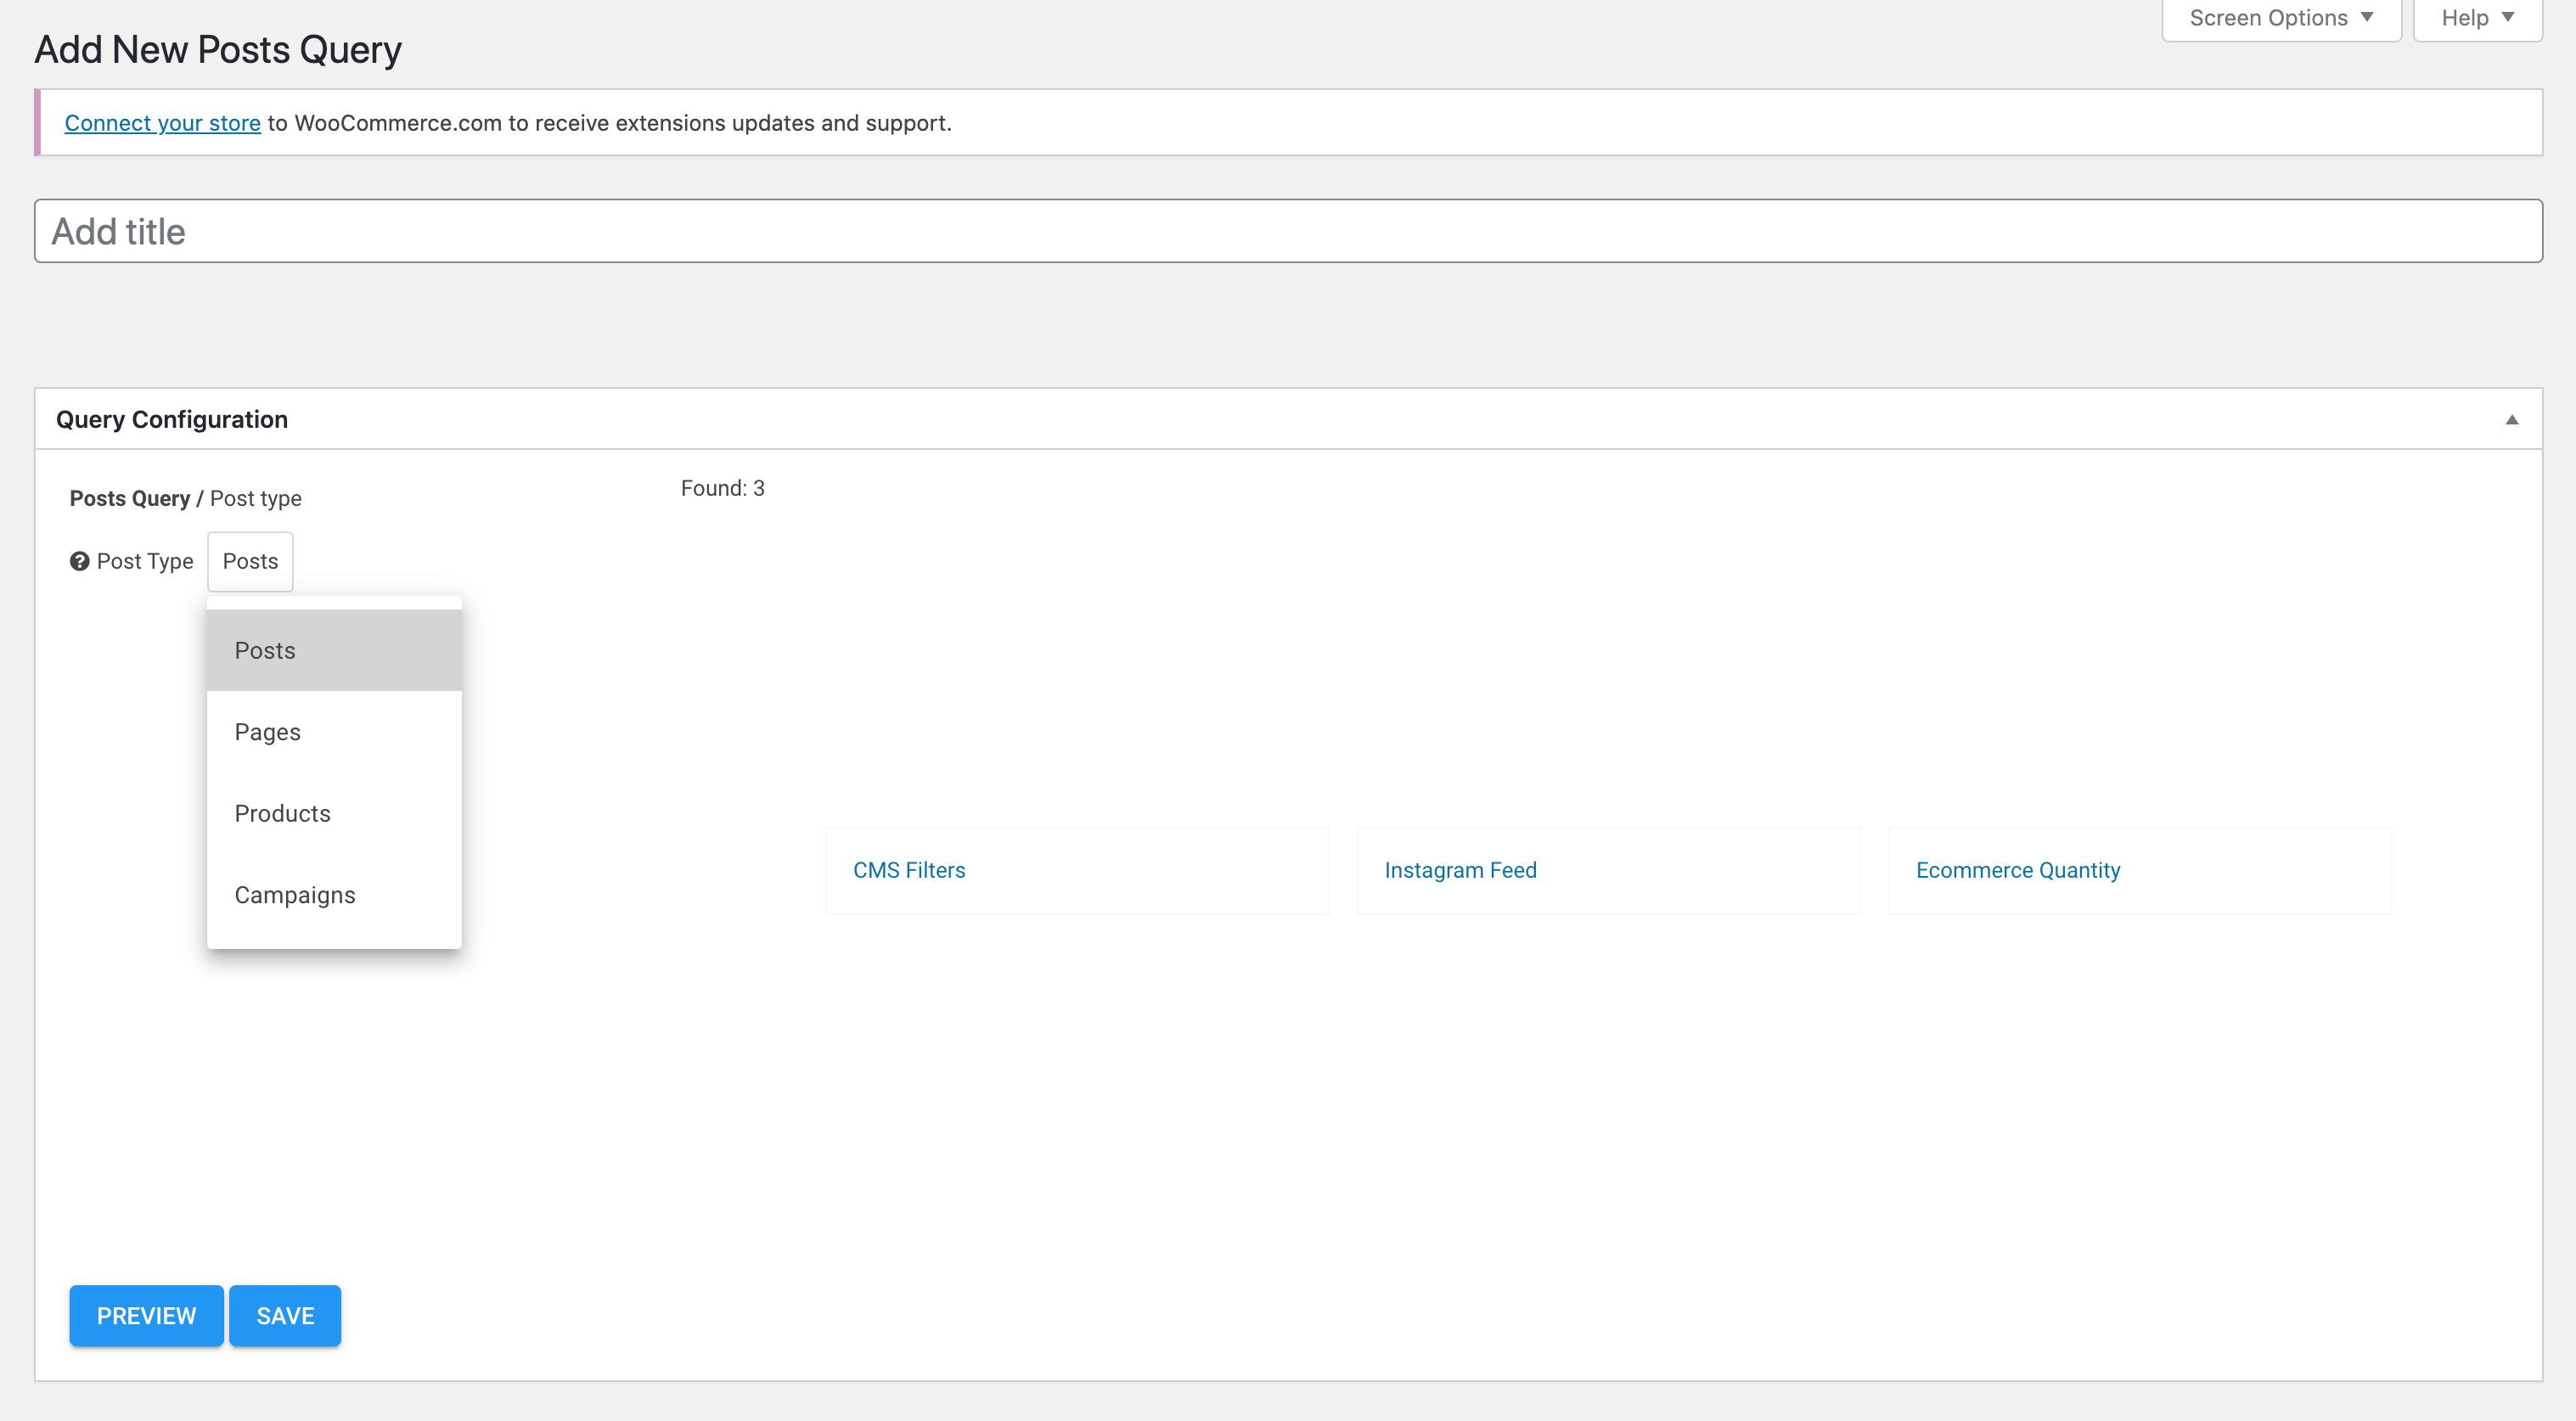
6. Configure Posts Queries under Udesly Plugin (how to show recent posts in other pages)
In this template we used two kinds of posts queries in order to show Recent Posts in the home page. Here we have to create the correspondent posts queries in WordPress.
Go to Udesly Plugin > Posts Queries > "Add New Post Query" button and create a new query.
Important: the name we assign to each post query in the Udesly Plugin must match with the name of the slug we have entered in Webflow.
Recent Posts: To show the recent posts section in homepage you have to add this title: recent-posts.

Note that you have to set the correct post type before save. From this section you can also choose the filters, the sort and the number of posts to show.
FAQ
Where I have to add CMS content?
Note that you have to insert the CMS content (posts, products, categories etc.) directly in WordPress. The CMS content you'll create in Webflow will not be exported.
Can I make layout changes?
Surely! All the layout changes must be done in Webflow. Once finished you only have to export the code, convert it again and re-upload the new Theme in WordPress.
I want to use the Udesly Fronted Editor in WordPress for my client. What's happening when the client edit any content?
Each content is referred through the hashing of the content itself. What you edit via Frontend Editor is deleted once there's no more reference about that specific content on Webflow. Contents are referenced through an hashing of the content itself.
E.G. an H1 with content "my title" gets hashed to a code like text_12123123, so when the client edits this, it changes the value that referres to that specific code. Every conversion releases always the same hash for the same content, so you lose your client's edits only if you change the H1 with text "my title" with another content.Because the hashing is always the same, if you have two duplicates elements in the same page (2 lorem ipsum, for example), these elements cannot be edited separately.